Creating a vendor
This guide explains how to create a new vendor (supplier) in the Merchant App so that purchase bills, payments, and purchase history can be accurately tracked for each vendor.
Prerequisites
- You are logged into the Merchant App with a role that has Edit access to Purchases.
Step 1: Open the Vendors screen
- From the main navigation bar, go to Purchases → Vendors.
- The Vendors list page opens and shows all existing vendors.
Step 2: Start adding a new vendor
-
Click the Add Vendor button.
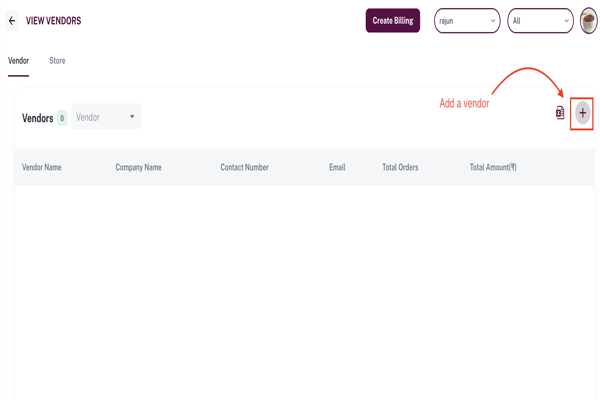
-
A New Vendor form or dialog appears.
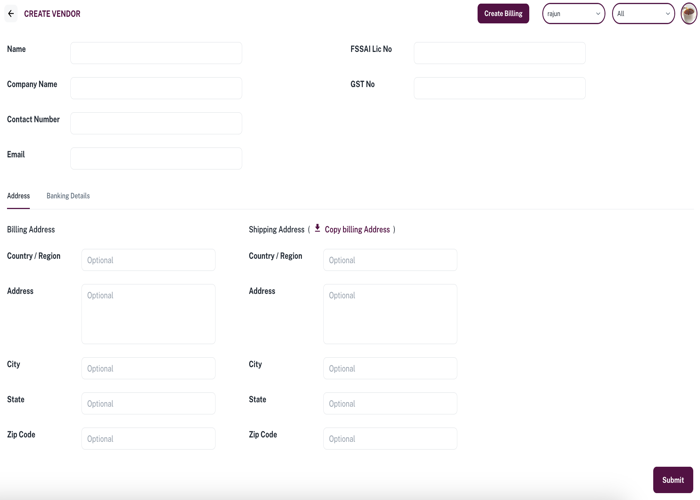
Example: New Vendor form with basic details section.
Step 3: Enter basic vendor details
In the top section of the form, fill in:
- Name: Vendor contact name or primary person name.
- Company Name: Legal or business name of the vendor.
- Contact Number: Mobile or phone number for communication.
- Email (optionals): Email address for sending purchase orders or bills.
- FSSAI Lic No (optional): Food safety license number, if available.
- GST No (optional): GST registration number of the vendor.
These details identify the vendor across purchase and payment screens.
Step 4: Enter billing and shipping address
- Stay on the Address tab.
- Under Billing Address, enter:
- Country / Region
- Address
- City
- State
- Zip Code
- Under Shipping Address, either:
- Click Copy billing address, or
- Manually enter Country / Region, Address, City, State, and Zip Code if different from billing.
Step 5: Add banking details (optional)
- Switch to the Banking Details tab.
- Enter the vendor’s bank information such as:
- Beneficiary name
- Bank name
- Account number
- IFSC
Step 6: Save the vendor
- Review all fields: Name, Company Name, contact details, and addresses.
- Click the Submit button at the bottom-right corner of the form.
After submission, the new vendor appears in the Vendors list and can be selected while creating purchase bills.